Etch-retained restorations

What are they?

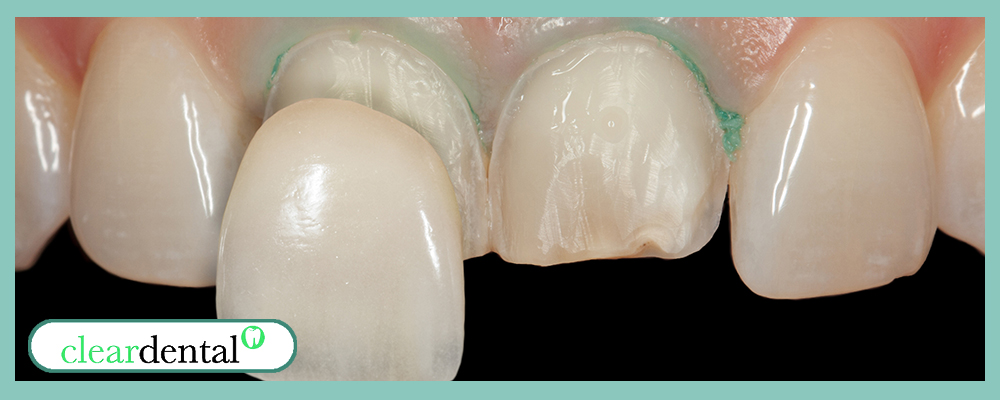
Many of the newer dental materials are adhesive, which means that they stick or ‘bond’ to teeth. The surface of the tooth needs to be made slightly rough so that the repair (the ‘restoration’) can grip properly. This is called ‘etching’ and your dentist will use a harmless mild acid. ‘Etch-retained restorations’ are any repairs attached to the tooth in this way – either fillings, veneers, inlays or onlays.

What will my dentist do?

Your dentist will:

• sometimes numb the tooth, but this is not always needed

• dab the etching acid onto the tooth surface that needs to be roughened

• leave the acid on the tooth for a short time while you keep your mouth open

• wash the tooth very thoroughly with a jet of water, which is sucked out of your mouth through a tube held by the dental nurse

• dry the tooth and check the surface (it might need to be etched again, in the same way)

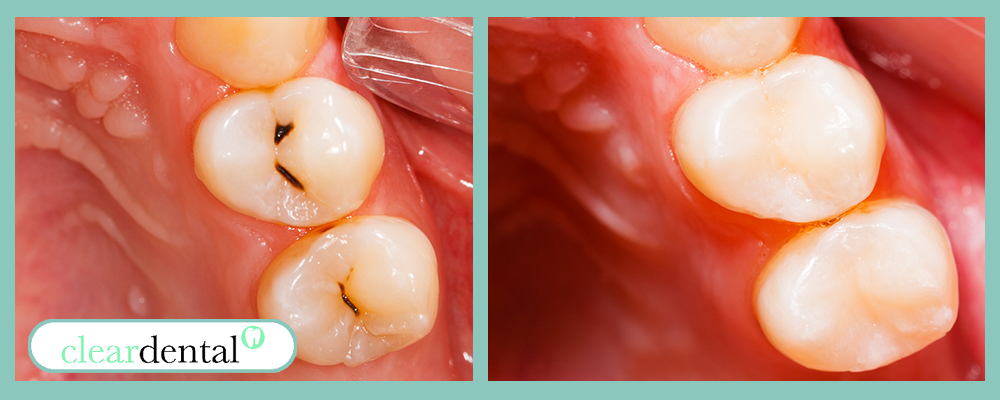
• paint the ‘bonding agent’ (a sort of glue) onto the roughened area, before filling the tooth or applying some other sort of restoration.

What are the benefits?

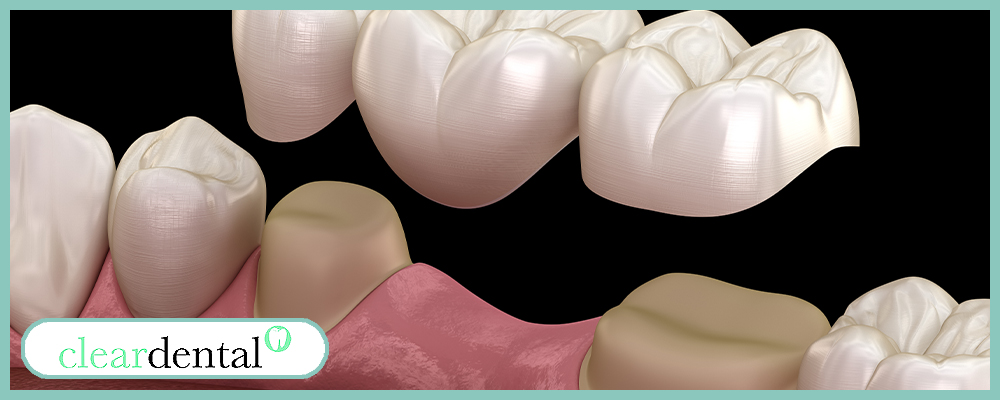
• The bond between the tooth and the restoration can be very strong so that the restoration stays in place for a long time. .Even if the bond breaks, it may be possible to re-glue the restoration in place.

• Because restorations are held in place by the bonding agent and not just by the shape of the tooth, less of the natural tooth is lost.

Veneers

What are they?

A veneer is a thin layer of tooth-coloured material that is put onto the front of the tooth to make it look better. This is done because the tooth might have been damaged by decay or an accident, or might be badly discoloured for some reason.

What will my dentist do?

Veneers are usually made out of porcelain by a dental technician. You will have to visit the dentist more than once for this type of veneer.

• Your dentist will check any fillings in the teeth first.

• A very small amount of natural tooth material needs to be removed – just enough to prevent the veneer making the tooth look or feel bulky. For this reason, it may not be necessary for the dentist to numb the tooth.

• Preparation time will depend on how damaged the tooth is and whether it needs to be built up with a filling first.

• The dentist will need to use a putty0like material to make a mould of your moth (called an ‘impression’), so the dental technician can tell the shape and size of veneer to make for you.

• Your dentist will glue the veneer made by the technician to the tooth when you next visit.

• Veneers sometimes come away from the tooth or break if the tooth is knocked or if you clench or grind your teeth. They can sometimes be glued back on, but will have to be replaced if they are damaged.

• Occasionally, sensitivity or death of the nerve can occur.

Some veneers are built up on the tooth directly using the same material that is used for white fillings. The surface of the tooth is roughened with a mild acid. Then white filling material is applied in layers until the teeth look right.

Your dentist may recommend trying internal bleaching of the tooth prior to veneer placement. Sometimes this can lighten the tooth sufficiently so that a veneer is not required, or if the tooth is very dark, it can lighten the shade making it easier for the veneer to mask the discolouration.

What are the benefits?

• Veneers can greatly improve your appearance. They hide imperfections, and you lose very little natural tooth material.

• Veneers also protect teeth from any more damage. Tooth surface can be dissolved away by acid in the mouth (usually from too frequent consumption of certain kinds of food and drink); this can make teeth very sensitive to hot and cold. In this situation, veneers can protect the teeth.

If the tooth is strong, a veneer is often a better option than a crown for improving a tooth’s appearance.

Extraction

What is it?

A tooth which is very decayed or damaged, or loose because of gum disease, may have to be extracted (taken out of your mouth).

Wisdom teeth sometimes have to be extracted if they have come through at an awkward angle and are causing problems (such as decay in adjacent teeth or, being difficult to clean, causing infections).

Teeth are sometimes taken out from children’s mouths to help other teeth which are crowded to grow straight, usually on the advice of an orthodontist.

What will my dentist do?

Some teeth are easier to take out than others. A local anaesthetic (an injection in your mouth) will be used to numb the tooth before it is extracted; this is the best treatment for most patients.

In some cases, for children or nervous patients, or where a tooth might prove difficult to remove, sedation (something to make you relaxed) with a local anaesthetic may be used. On rare occasions a general anaesthetic may be considered. If a general anaesthetic is needed, you will have to go to a hospital or a specialist treatment centre (you are likely to be able to go home the same day, but not all patients are able to do so).

After working out the best way to take the tooth out, your dentist will discuss with you:

• how to minimise what you feel while the extraction is happening

• whether you should bring someone with you if you are to have sedation or a general anaesthetic

• when it would be convenient for you to have the tooth removed

• you might also discuss other treatment you might need – for example, whether you may require a denture

While the tooth is being taken out…

You may hear some noise and feel some pressure as the tooth is being eased out – but you should not feel pain. Sometimes stitches are put into the gum to minimise any post extraction bleeding, to make the area more comfortable and help it heal quickly.

Afterwards…

You may need a day or so off work to recover, depending on how difficult the extraction was and whether sedation or a general anaesthetic was used. Most people experience very little post-operation discomfort. The dentist will ensure that bleeding has stopped before you leave the practice. You should not smoke or drink for at least 24 hours after an extraction.

The dentist will give you advice on:

• how to look after the space where the tooth was while it is healing

• which painkillers are suitable to use so you are not in any discomfort when the anaesthetic wears off

• how to contact the practice if there are any problems

Tooth coloured fillings

What are they?

A filling replaces part of a tooth that has been lost because of decay or through accidental damage.

You may hear the dentist talk about ‘composite’, ‘glass ionomer’ and ‘compomer’ – these are different types of tooth coloured filling material.

What will my dentist do?

Your dentist will:

• Usually numb the tooth and adjacent area with an injection – some small fillings may not need this.

• Remove any decay, together with any old filling material, and shape the cavity using a small, high-speed drill.

• Wash and dry the tooth by blowing water and then air onto it.

• Use one of a variety of means to isolate the tooth and keep it dry.

• Apply a special adhesive to the tooth, typically in two or three stages, and then place the filling, again in stages.

• Harden the filling material between stages of the filling procedure, by the use of a bright light shone inside the mouth – this is called ‘curing’.

• Trim the filling as necessary and then polish it, checking that you can bite together comfortably.

What are the benefits?

• A tooth needs less drilling for a tooth coloured filling than for a silver filling.

• Unlike silver fillings, tooth coloured filling materials, which come in different shades to match different coloured teeth, are glued into place, sealing the filling and helping to strengthen the remaining part of the tooth. Tooth coloured filling materials can be used in most situations, including the filling of back teeth and making front teeth look better.

• When used in back teeth, tooth coloured fillings look better than silver fillings, but take longer to place, partly because they are finished and polished in one visit. Tooth coloured fillings may not wear as well as silver fillings but they do have the advantage that they can be repaired, rather than replaced, as and when something goes wrong.

• The longevity of tooth coloured fillings is greatly extended by good oral hygiene.

Fixed bridges

What are they?

A bridge fixes a replacement tooth (or teeth) to one or more remaining natural teeth or implants. Some bridges have crowns at each end. Others are fixed to the surface of the teeth next to the gap. Sometimes a bridge is only fixed to the tooth on one side of the gap.

Bridges are made of metal and porcelain or sometimes just porcelain.

What will my dentist do?

There are several stages in making a bridge:

• The dentist uses a soft, mouldable material to take impressions of your mouth. A dental technician makes exact plaster models of your uppper and lower teeth and gums, which show how your teeth bite together.

• The teeth that will support the bridge are prepared to take the fixings and to make sure that the bridge is not too bulky.

• Another impression is taken of the teeth and any gaps, and the dental technician uses this to make the bridge. A plastic temporary bridge or temporary crown may be fitted in the meantime.

• At your final visit, the dentist will check that the bridge fits, make any minor adjustments and then fix it permanently in place. Your dentist or hygienist will show you the best way of keeping your new bridge clean.

What are the benefits?

• A bridge lets you almost forget that you have missing teeth.

• It can improve the way you look, bite, chew and speak.

• The teeth can be matched to the colour of your own teeth.

• A bridge can last many years if you keep it and the adjacent soft tissue clean and if there is no accidental damage.

• Natural teeth are protected from wear and tear, and from moving or tilting out of line, which could cause your teeth to bite together incorrectly.

Other options…

It may be possible to restore small spaces with one or more dental implants. This has the advantage that adjacent teeth do not need to be cut, but the disadvantage that a surgical procedure is required, and treatment time may be extended. Implants are not widely available within the NHS, apart from in certain situations.

Another option for a small space could be a ‘minimum preparation bridge’, where the false tooth is held in place with a wing that is bonded onto adjacent teeth. This involves less destruction of tooth tissue but can require repair or replacement.

Longer, or multiple, spaces may be restored with acrylic or metal partial dentures. These are removable and so are easier to keep clean; it’s also easier to clean the adjacent natural teeth. However, some patients find dentures difficult to tolerate.

Fissure sealants

What are fissure sealants?

Fissures are grooves usually found in the chewing surface of back teeth. They are difficult to keep clean so there is more risk of decay. Fissures can be sealed with tough plastic to protect them.

The plastic is runny at first but sets hard, like paint Sealants may be see-through or tooth-coloured. They are normally only used for children and only on permanent teeth, not on milk teeth.

Your dentist will discuss whether your child needs sealants. If they do, you will also have to agree which teeth need to be sealed. The need for sealants will depend on:

• the shape of each tooth;

• how much a child’s teeth have already decayed;

• how much decay a brother or sister has had (because there can be family patterns in tooth decay); and

• a child’s general health (because general health problems can make it especially important to avoid dental problems).

What will my dentist do?

The dentist will:

• clean the tooth thoroughly with a rotating brush or rubber polisher

• dry the tooth and keep it dry by putting cotton wool round it and using suction

• dab a mild acid on the tooth and leave it for a short time to make the tooth surface rough (this will not hurt at all)

• wash and dry the tooth by blowing water and then air onto it

• change the cotton wool rolls around the tooth to keep it dry

• paint the plastic onto the fissures

• harden the plastic by pointing a bright light at it (you will see the dentist and dental nurse protecting their eyes)

• check that the tooth is comfortable to bite on

• trim the sealant

What are the benefits?

• Fissures sealants protect teeth from decay.

• They can last for years. Or, if they fall out or wear out, they can usually be replaced if there is no decay underneath.